Chimichurri Quinoa Salad |vegetarian | gluten free

The star of this hearty summer salad is most definitely the dressing. A triple-threat of bright and flavoursome herbs with a splash of lime juice this chimichurri inspired dressing soaks into every bite and unites all the other ingredients in summery perfection.Chimichurri Quinoa Salad | vegetarian | gluten free | Thoroughly Nourished LifeChris and I arrived in New Orleans after a very long day of travelling. Our lovely Air BnB host Georgia recognised two weary and hungry travellers and took us on a tour of the neighbourhood, which ended at the gorgeous St. Roch Market.St Roch Market New Orleans | Thoroughly Nourished LifeIf you are staying anywhere in the St. Roch neighbourhood or nearby, you need to stop by the marketplace. Walking inside you are welcomed by a line up of vendors on either side of the historic building each offering a different taste experience or regional cuisine. Chris fell in love with the ‘Dirty Mac and Cheese’, which features smoked gouda, crawfish, and bacon. My heart, however, belonged to the team at JuiceNOLA from the very first bite of their Greek Goddess Salad. When I tasted their Chimi Chimi Bang Bang Salad for lunch one day, and had to return for a second round at dinnertime that night, I knew I had to find a way to keep getting this salad in my face when I returned home.Chimichurri Quinoa Salad | vegetarian | gluten free | Thoroughly Nourished Life

Chimichurri Quinoa Salad | vegetarian | gluten free | Thoroughly Nourished Life
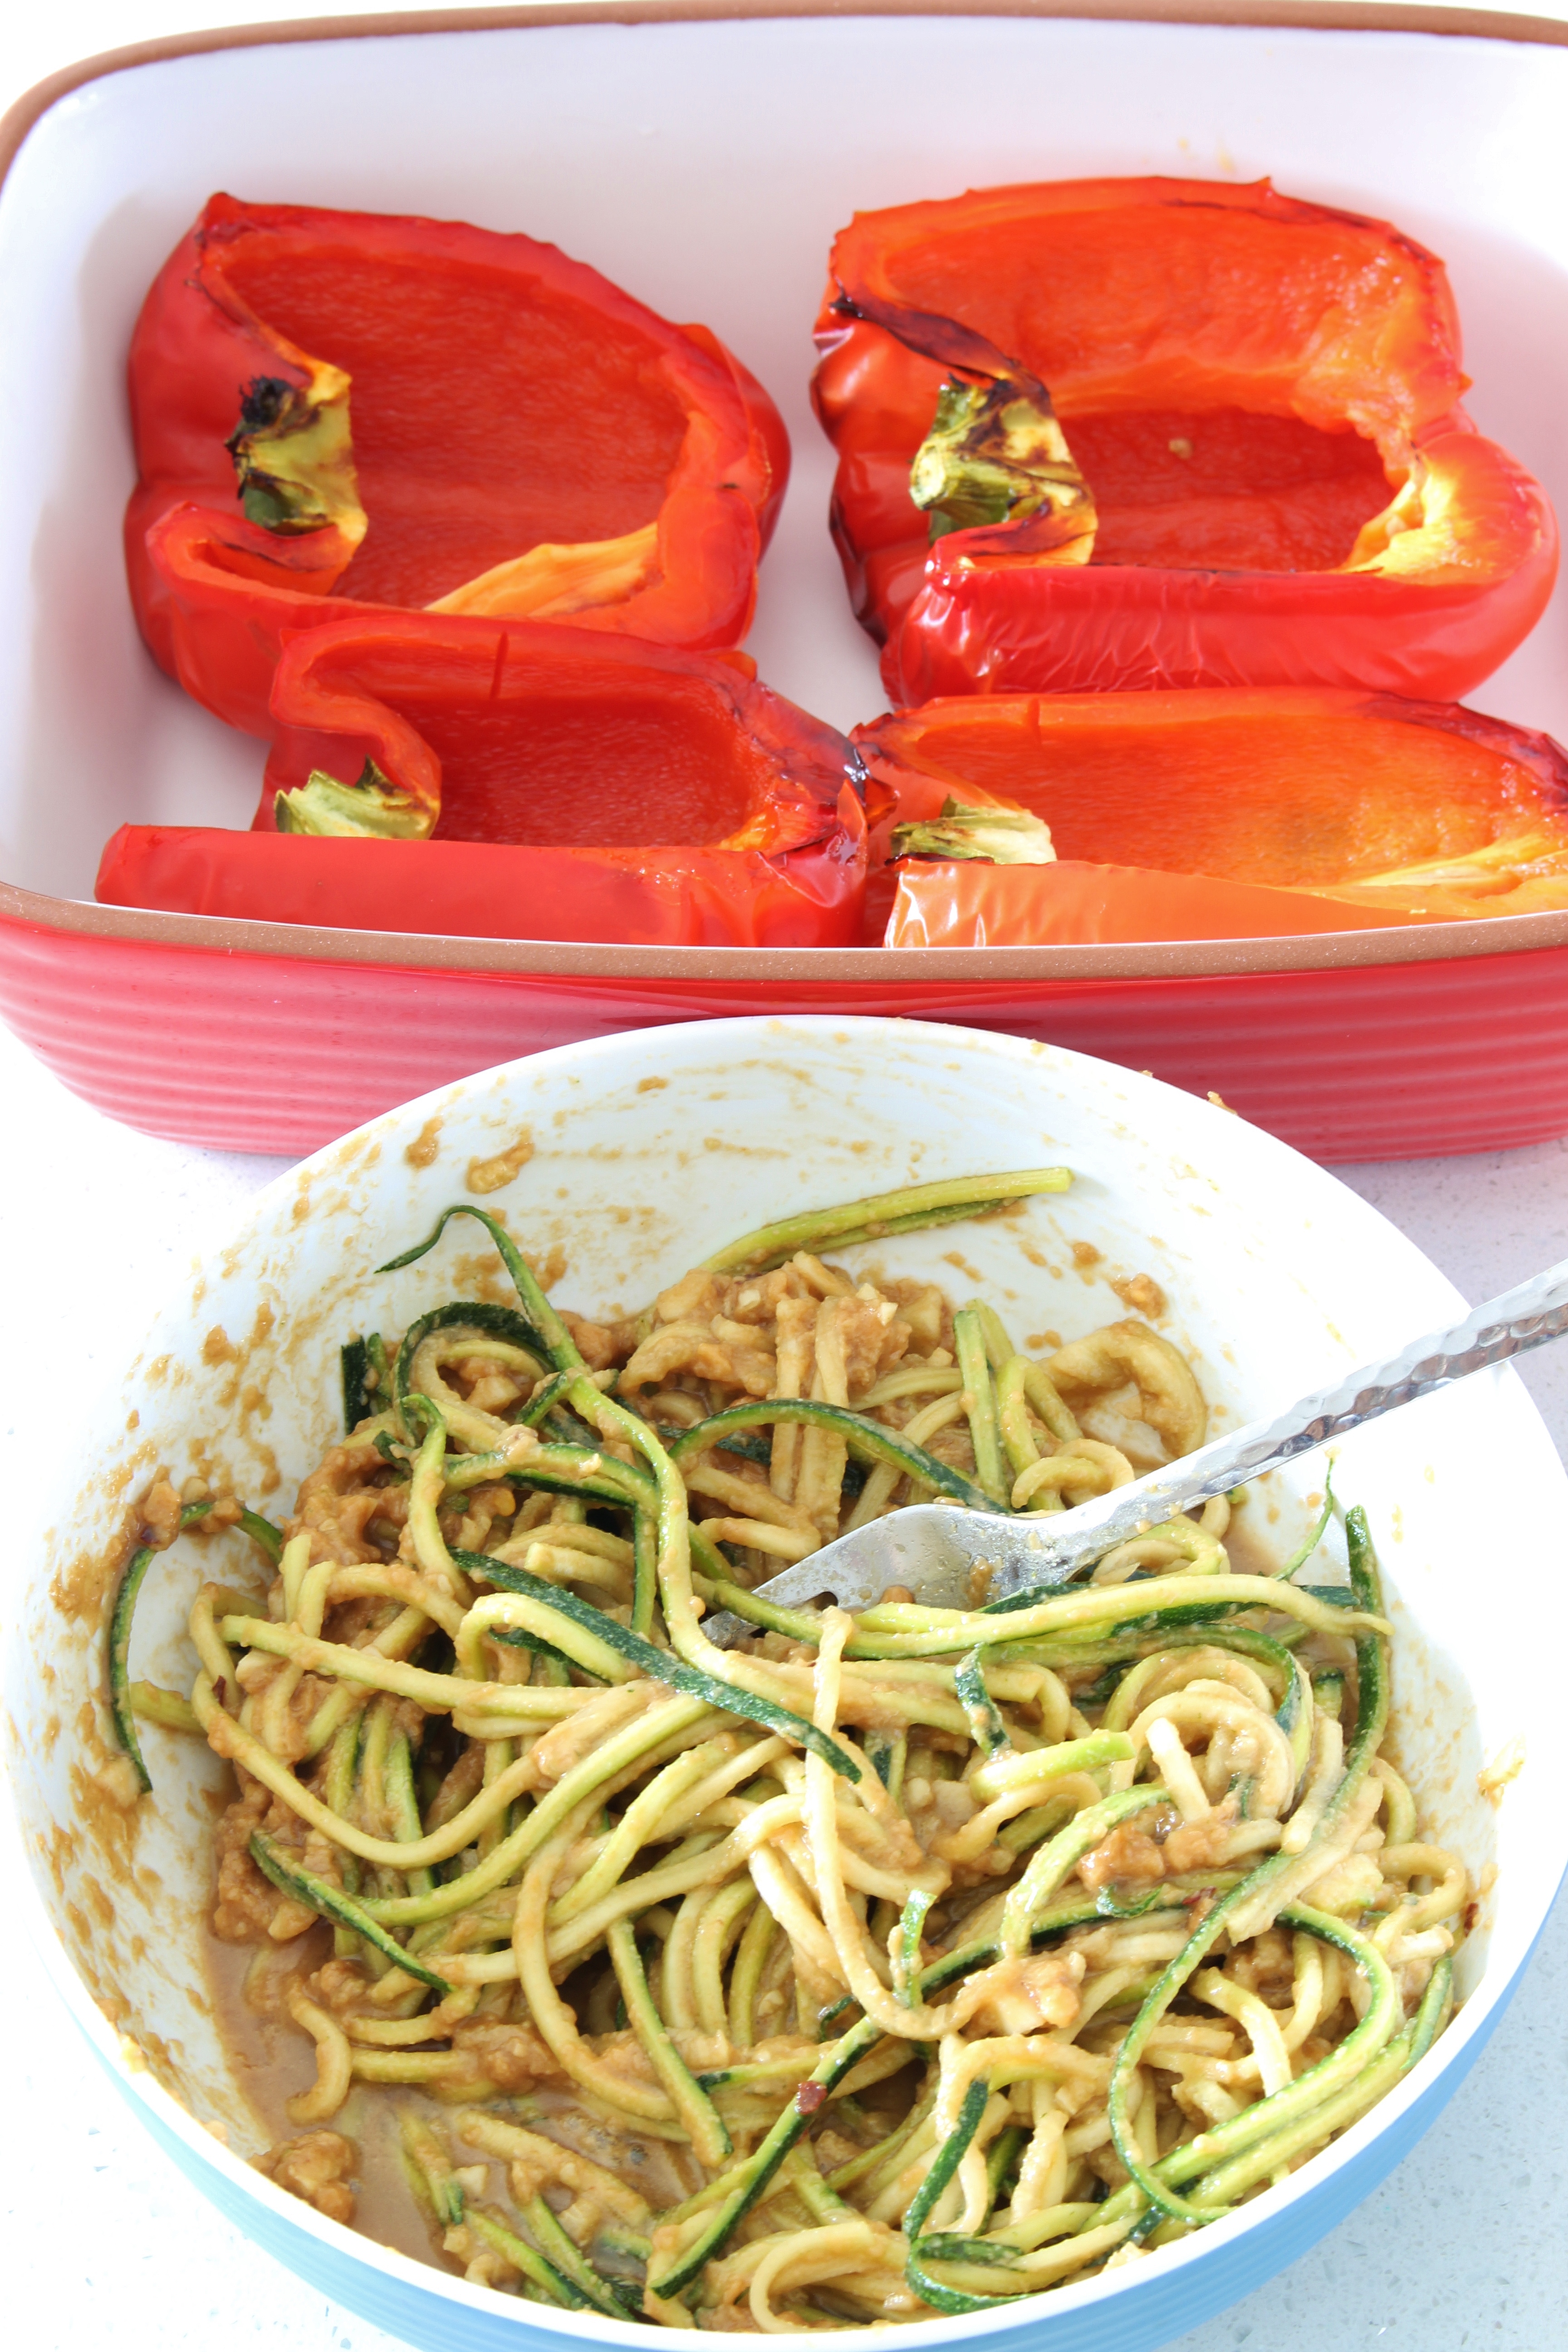
The base of this salad is quinoa and your favourite green. I used oak leaf lettuce because I have a serious leafy green crush on it that will never end. To this you add butter beans. The team at JuiceNOLA used black beans so mix it up as you wish. The magic is in the dressing. Chimichurri is essentially a mix of parsley, coriander, chives, and basil with a spark of bright acidic sharpness and garlic. It is absolutely what makes this salad such a stand-out.Chimichurri Quinoa Salad | vegetarian | gluten free | Thoroughly Nourished LifeThe magic dressing aside, there are just so many bits and pieces in this salad that make every nibble unique and moreish. Into our solid base of quinoa + greens + beans we add chopped roasted capsicums and a healthy dose of pumpkin seeds. Toss everything together with the dressing and make sure all the nooks and crannies are coated in green deliciousness, and then top the bowl with avocado and feta. I may not be in New Orleans anymore, but I can bring some JuiceNOLA magic to work in my lunchbox everyday!Chimichurri Quinoa Salad | vegetarian | gluten free | Thoroughly Nourished Life

Chimichurri Quinoa Salad

Vegetarian | Gluten Free | Serves 3 generously | Leftovers will keep for up to two days in an airtight container in the refrigerator

Ingredients

  • 1 cup dry quinoa
  • 2 cups low sodium vegetable stock
  • 1/2 head of oak leaf lettuce (or 4 cups of your favourite greens)
  • 400 gram can butter beans, drained and rinsed well
  • 1/2 cup chopped roasted capsicum
  • 2 tablespoons pumpkin seeds
  • 1 medium avocado
  • 1/3 cup crumbed feta

For the chimichurri dressing

  • 1/3 cup fresh basil leaves
  • 1/3 cup fresh coriander leaves
  • 1/3 cup fresh Italian parsley
  • 1/4 cup chopped chives
  • 1/4 cup lime juice (about 2 limes)
  • 2 cloves garlic, roughly diced
  • 1 tablespoon olive oil (or use oil from roasted capsicums)

Method

  1. Rinse quinoa thoroughly and place in a medium saucepan with vegetable stock. Bring to a boil, then cover with the saucepan lid and reduce heat to a simmer. Cook for 15 minutes then remove from the heat and let the quinoa stand, covered, for 5 minutes before fluffing with a fork. Cool to room temperature before proceeding with the recipe.
  2. While the quinoa is cooling, prepare the dressing. Place basil, coriander, parsley, chives, lime juice, garlic, and olive oil into the bowl of a small food processor. Process until everything is finely chopped and then pulse until pureed.
  3. To assemble the salad place cooled quinoa, lettuce, butter beans, roasted capsicum, pumpkin seeds and dressing into a large bowl. Pour chimichurri dressing over the top and then toss gently but thoroughly until everything is well mixed and coated in dressing.
  4. Thinly slice the avocado and place on top of the salad. Crumble feta over salad and serve.

Chimichurri Quinoa Salad | vegetarian | gluten free | Thoroughly Nourished Life

Mocha Banana Buckwheat Granola | gluten free | vegan

Mornings are hard. Let’s all acknowledge that and move on because I have found the solution: make a breakfast that you can’t wait to leap out of bed to eat! Cue my latest, and greatest, granola recipe: Mocha Banana Buckwheat Granola! Get those bowls and spoons ready folks!Mocha Banana Buckwheat Granola | Gluten Free | Vegan | Thoroughly Nourished LifeI got very excited in a health food store the other day. I’m sad to report that this happens quite often, and not just in health food stores. The abundance of awesome new ingredients to try in a different grocery store has me busting into rhyme, and the taste of the first sweet summer peaches can induce worrisome dancing. If you’ve been around me and food, you have seen some manifestation of the excitement that comes from me finding something tasty or new. Anyway, what had me excited this particular afternoon was the discovery of buckwheat flakes! As in, buckwheat kernels that have been rolled into wholesome oat-like flakes, but not oats! As soon as I had a box in my hot little hands I just knew that I wanted them to feature in a new granola recipe.Mocha Banana Buckwheat Granola | Gluten Free | Vegan | Thoroughly Nourished LifeThis gluten free, vegan granola recipe is an absolute winner and probably my best granola recipe ever. Ever. Just look at those clumps! I love chunky, clumpy granola and this recipe is perfection! It starts with a base of super gluten free grains. The aforementioned buckwheat flakes, which behave like oats in this recipe and provide a super stable base to build on, are joined by buckwheat groats (for super crunch), and raw quinoa. So much the crunch.Mocha Banana Buckwheat Granola | Gluten Free | Vegan | Thoroughly Nourished LifeTo these grains of goodness (actually, both buckwheat and quinoa are seeds) we add walnuts, chia seeds, mashed banana, a touch of maple syrup, cocoa powder, and a dash of instant espresso powder because some mornings we need to put the coffee in our breakfast as well. Granola is one of the best things to make for yourself. Not only do you save money but you can customise it to suit your tastebuds. This granola was exactly what my tastebuds wanted. It’s crunchy and interesting, every bite brings something different. There’s crispy bits and the slightly chocolaty binding holding it all together and it’s a not too sweet a start to your morning. I paired mine with tart protein-rich Greek yoghurt and some sweet seasonal blueberries. It’s also great for snacking on, or for dessert with a sneaky square or two of dark chocolate.

Come on folks, take back your mornings and get a great start with my Mocha Banana Buckwheat Granola!Mocha Banana Buckwheat Granola | Gluten Free | Vegan | Thoroughly Nourished Life

Mocha Banana Buckwheat Granola

Gluten free | Vegan | Makes about 5 cups | Store in an airtight container in the fridge for up to two weeks.

Note: If you do not require a gluten free diet, or you can buy certified gluten free oats where you live, you can substitute the buckwheat flakes for 1 cup of rolled oats.

Ingredients

  • 1 cup buckwheat flakes (see note)
  • 1 cup buckwheat groats (kernels)
  • 1/2 cup uncooked quinoa
  • 1 cup walnut halves
  • 2 tablespoons chia seeds
  • 1/2 teaspoon salt
  • 1 1/2 teaspoons ground cinnamon
  • 2 tablespoons cocoa powder
  • 1 large banana, mashed (about 1/2 cup)
  • 2 1/2 tablespoons rice bran oil (or melted coconut oil)
  • 3 tablespoons maple syrup
  • 2 teaspoons vanilla extract
  • 2 teaspoons instant coffee powder
  • 1/2 cup banana chips (about 100 grams)

Method

  1. Preheat your oven to 160C (320F) and line a large, rimmed, baking sheet with baking paper.
  2. In a large bowl mix together buckwheat flakes, buckwheat groats, quinoa, walnuts, chia seeds, salt, cinnamon, and cocoa powder until very well mixed.
  3. In a small bowl whisk together mashed banana, oil, maple syrup, vanilla extract and instant coffee powder until very well blended.
  4. Pour wet mixture over dry blend and mix well with a wooden spoon until there are no pockets of dry mixture.
  5. Spread out over the lined baking sheet and press down slightly with the back of the wooden spoon. This will help the clumps to form.
  6. Bake in preheated oven for 30 minutes. Switch the position of the tray halfway through baking time to ensure everything browns evenly.
  7. Remove from oven and allow to cool completely.
  8. Once cooled, break into clumps and mix banana chips through the granola.
  9. Store or serve and enjoy!

Mocha Banana Buckwheat Granola | Gluten Free | Vegan | Thoroughly Nourished Life

If you are looking for more granola inspiration check out these delicious nibbles around the ‘net:

Chocolate Layer Cake with Peanut Butter Frosting | gluten free

A slice of moist gluten free double-layer devil’s food chocolate cake with peanut butter frosting is hard to resist. So get ready to dig in! Chocolate Layer Cake with Peanut Butter Frosting | Gluten Free | Thoroughly Nourished LifeThis year for Halloween instead of making spooky-themed treats (which I love by the way) I wanted to share with your desserts and treats influenced by my favourite childhood sweets. Hence: honeycomb, cherry ripe, and caramel popcorn. Now for the ultimate in all decadences, and a dessert influenced by our collective obsession: chocolate and peanut butter.Chocolate Layer Cake with Peanut Butter Frosting | Gluten Free | Thoroughly Nourished LifeThis cake is based on a recipe that I have made many, many, many times in it’s gluten-ful incarnation. I was a little apprehensive in adapting it because, let’s be honest, sometimes things are lost in the translation from gluten-ful to gluten free. I weighed, creamed, mixed, poured, and then waiting. When the cake was cooked and cooled I levelled the tops and taste tested the scraps of cake. Perfection. Just the same bouncy, tender, moist crumb. The same cocoa intensity. Exactly as I had remembered, now friendly for us gluten free folks. We can have our cake and eat it too!

As with any cake making expedition, here are my top tips:

  • Make sure your butter is softened.
  • Bring your eggs to room temperature because they will whip better this way and give your cake the right light, airy texture.
  • Whisk your dry ingredients together (or sift them) very well to ensure no lumps and to make sure your leavening ingredient (in this case baking soda) is evenly distributed.
  • Lick the spoon. Obvi.

Chocolate Layer Cake with Peanut Butter Frosting | Gluten Free | Thoroughly Nourished LifeTwo perfect layers of devil’s food cake are sandwiched together here with salty-sweet peanut butter frosting. Oh my Reeses. I could eat a bowl of this frosting all by itself. Who am I kidding. I probably have eaten a bowl of this frosting by itself once or twice in my baking life. I use chunky (or super chunky when I can find it) peanut butter in this frosting because I love the texture the chunks of peanut adds to the smooth, buttery frosting. You could use smooth but you do it at your own risk. Team Chunky all the way.
Chocolate Layer Cake with Peanut Butter Frosting | Gluten Free | Thoroughly Nourished LifeThis cake is nothing but simple, classic, perfection layered together. This gluten free devil’s food cake is moist, tender, and deeply chocolaty. A classic chocolate cake that is perfect for birthday, Halloween, and every cake requiring celebration in between. This is a gluten free layer cake that you can be proud of, and that I want you to have fun with. Not interested in peanut butter frosting? Firstly, who are you? Secondly, try a classic chocolate frosting, or a white chocolate frosting, or contrast the chocolate with a smooth vanilla buttercream. Take this gluten free cake and make it your own!Chocolate Layer Cake with Peanut Butter Frosting | Gluten Free | Thoroughly Nourished Life

Chocolate Layer Cake with Peanut Butter Frosting

Gluten free | Serves 12

Ingredients

  • 3/4 cup cocoa
  • 3/4 cup Greek yoghurt
  • 3/4 cup warm water
  • 120 grams buckwheat flour
  • 100 grams white rice flour
  • 100 grams brown rice flour
  • 100 grams sorghum flour
  • 1 teaspoon baking soda
  • 1/2 teaspoon salt
  • 300 grams butter, softened
  • 2 cups (400 grams) caster sugar
  • 4 large eggs
  • 1 tablespoon vanilla

For the frosting

  • 150 grams butter, softened
  • 1/2 cup chunky peanut butter
  • 2 teaspoons vanilla essence
  • 2 tablespoons milk
  • 500 grams icing sugar (gluten free)
  • Shaved chocolate for decorating (optional)

Method

  1. Preheat your oven to 180C (350F) and butter and line two round 8-inch cake tins with baking powder. Set aside until required.
  2. In a medium bowl whisk together cocoa, warm water and Greek yoghurt until very smooth.
  3. In another medium mixing bowl whisk together buckwheat flour, white rice flour, brown rice flour, sorghum flour, baking soda, and salt.
  4. In the bowl of a standmixer fitted with the paddle attachment (or in a large mixing bowl using a handmixer) beat together butter and caster sugar until light and fluffy, about three minutes.
  5. Add eggs one at a time and beat until well incorporated. Scrape down the sides of the bowl between additions. Mix in vanilla.
  6. Turn your mixer to low speed and mix in flour in two parts alternating with the cocoa mixture. Beat until combined.
  7. Divide batter evenly between pans. Bake for 45-50 minutes or until the tops of the cakes spring back when lightly touched and a wooden skewer inserted into the middle comes out clean.
  8. Remove cakes from the oven and cool completely before frosting.
  9. To make the frosting: beat butter and peanut butter and light and creamy. Add remaining ingredients and beat until light and fluffy, about three minutes.
  10. Trim tops of cakes so that they are flat. Place one layer on your cake plate or stand. Frost with 1/3 of the peanut butter frosting. Place other cake cut side down on top of the bottom layer and then frost the cake with remaining frosting. Sprinkle with shaved chocolate if using.
  11. Serve. If not serving refrigerate until required. Take out of the fridge 30 minutes before serving.

Chocolate Layer Cake with Peanut Butter Frosting | Gluten Free | Thoroughly Nourished Life

Cherry Ripe Slice | gluten free

Cherry and coconut filling coated in dark chocolate atop a cocoa biscuit base. It’s everything you love about a Cherry Ripe bar in gluten free baked form! Get out a cold glass of milk and put your feet up with a slice of this delight by your side!Cherry Ripe Slice | Gluten Free | Thoroughly Nourished LifeCherry ripes were not one of my favourite chocolate bars as a little kid, but when I got to high school I took a liking to them. There’s something a little naughty sweet about the sweet cherry coconut filling coated in dark chocolate. It’s the perfect chocolate bar for a teenage girl. And it’s actually one of the oldest chocolate bars sold in Australia! There’s your Random Australian Fact for the day. Cherry Ripe Slice | Gluten Free | Thoroughly Nourished LifeThis slice is just like a cherry ripe bar met a biscuit and they became friends. Delicious, delicious friends. These bars start off with a very simple biscuit base that is pressed into a tin and partially baked. Then you chop up pretty pink glace cherries and mix them together with sweet condensed milk, and shredded and dessicated coconut and bake it for a little while until the condensed milk caramelises slightly on top. Once this naked cherry ripe bar (ooh) has cooled the bar is topped with molten semi-sweet chocolate. Just look at those swirls.Cherry Ripe Slice | Gluten Free | Thoroughly Nourished LifeI could not get enough of this slice. I loved the not-so-sweet biscuit topped with the sweet and sticky cherry-coconut filling and the deeply dark chocolate coating. Paired with a cold glass of almond milk this is the afternoon delight I would choose after a long sticky summer run. This would also be the perfect treat for boardgame night. It’s a little more of a grown-up’s treat than a treat for kids given the dark chocolate and it’s just so moreish. Give yourself a treat this weekend and leave the mini chocolate bars for the kids. I know I’ll be sneaking a few slices while I’m scaring little trick-or-treaters!Cherry Ripe Slice | Gluten Free | Thoroughly Nourished Life

Cherry Ripe Slice

Gluten Free | Makes 16 squares

Ingredients

For the base

  • 125 grams butter, softened
  • 1/3 cup caster sugar
  • 1 teaspoon vanilla essence
  • 1 large egg
  • 30 grams (1/4 cup) cocoa powder
  • 80 grams buckwheat flour
  • 40 grams brown rice flour
  • 40 grams white rice flour

For the filling

  • 200 grams glace cherries
  • 1 cup sweetened condensed milk
  • 1 cup dessicated coconut
  • 1/2 cup shredded coconut

For the topping

  • 150 grams dark chocolate

Method

  1. Preheat your oven to 160C (320F) and line an 8-inch square baking tin with baking paper.
  2. In a large bowl beat together softened butter, caster sugar, and vanilla essence until light and fluffy. Add egg and beat well.
  3. In a small bowl whisk together cocoa powder, buckwheat flour, white rice flour and brown rice flour.
  4. Add flours to wet ingredients and mix until well combined into a sticky dough. Place dough into the lined baking dish and use the back of a spoon to press the mixture into the tin. Ensure it is as level as possible.
  5. Bake base in preheated oven for 10 minutes. Then remove and allow to cool slightly.
  6. Use a small food processor to finely chop glace cherries.
  7. Place cherries, condensed milk, and both coconuts and mix well.
  8. Spread filling over the base evenly.
  9. Bake filling for 20 minutes or until the top is slightly browned.
  10. Remove from oven and allow to cool completely before topping with chocolate.
  11. Chop dark chocolate roughly and place in a microwave safe bowl. Heat in 30 second bursts, stirring well with a metal spoon between microwave bursts until the chocolate is melted and smooth.
  12. Spread melted chocolate over the cooled slice.
  13. Chill until chocolate is completely set and then use a very sharp knife to cut into squares.

Cherry Ripe Slice | Gluten Free | Thoroughly Nourished Life

Salted Caramel Popcorn and White Chocolate Chip Cookies | gluten free

We are nibbling our way around Las Vegas at this very moment, but oh the memories of this cookie are lingering, and I’m planning on a batch as soon as we get home.

Chewy gluten free cookies full of salted caramel popcorn morsels and sweet white chocolate chips. These are a combination of two of my favourite childhood treats!Salted Caramel Popcorn Cookies | Gluten Free | Thoroughly Nourished LifeHave you ever had the pleasure of eating Lolly Gobble Bliss Bombs? If you haven’t, I’m sorry, but I do hope you have your own favourite sticky, caramel-coated popcorn treat. Lolly Gobble Bliss Bombs were an 80s favourite, but they’ve never gone out of style.

For these cookies I made my own salted caramel popcorn because it’s super, super easy (that’s dangerous knowledge for our waistlines I know) and then I mixed it into chewy, brown sugary, buttery, cookie dough with some white chocolate chips. The caramel popcorn coating melts slightly as the cookies bake creating pools of sticky salted caramel perfection. Drooling.Salted Caramel Popcorn Cookies | Gluten Free | Thoroughly Nourished LifeI sent these home with my Mum and Dad to thank them for being our taxi to and from the airport. A day later I got a photo of the empty container. All gone. Yes, they are that good. And my parents have a sweet tooth. See! It’s genetic! Every butter, caramel-soaked, white chocolate studded fantasy you have is answered in these cookies. And I only got to eat one. One. And my house smelled like these cookies for days. If you aren’t into scented candles or air-spray contraptions, just bake a batch of these. You will drive your neighbours wild. And probably find yourself sneaking to the cookie jar for just one more…Salted Caramel Popcorn Cookies | Gluten Free | Thoroughly Nourished LifeBite into this cookie and your teeth first meet chewy cookie dough, then crunchy popcorn pieces, super sweet chocolate chips and, if you are lucky, a little pool of molten caramel. Be generous with these cookies. Share the happiness and gobble up some of this biscuits of bliss! Although, it is totally acceptable to hoard the whole batch for yourself and eat them while hiding in your closet with a good book and a glass of cold milk. I won’t tell anyone.Salted Caramel Popcorn Cookies | Gluten Free | Thoroughly Nourished Life

Salted Caramel Popcorn and White Chocolate Chip Cookies

Gluten free | Makes about 18 cookies | Preparation Time: 30 minutes | Cooking Time: 20 minutes | Cookies will keep in an airtight container for up to four days.

Tip: to make these extra quick you can use pre-made caramel popcorn.

Warning: this recipe involves melting sugar. Molten sugar is incredibly hot. BE CAREFUL when handling the caramel and if making this with kids be sure to keep little fingers out of the way. Take it from someone who had third-degree burns from making caramel, okay?

Ingredients

For the salted caramel popcorn

  • 4 cups air-popped popcorn
  • 1 cup caster sugar
  • 50 grams butter
  • 1 teaspoon sea salt

For the cookies

  • 50 grams sorghum flour
  • 50 grams buckwheat flour
  • 40 grams brown rice flour
  • 35 grams white rice flour
  • 1/2 teaspoon baking soda
  • 120 grams butter, softened
  • 1/2 cup caster sugar
  • 1/2 cup brown sugar
  • 1 teaspoon vanilla extract
  • 1 egg
  • 1/2 cup white chocolate chips

Method

  1. Preheat your oven to 180C (350F) and line two baking trays with baking paper.
  2. First, make the popcorn. Place the air-popped popcorn into a large mixing bowl.
  3. Place sugar in a heavy-bottomed saucepan over medium heat. The sugar will begin to melt in a few minutes. Gently shake the pan to mix the molten sugar around the pot. When it starts turning a deep honey colour remove from the heat and whisk any un-melted sugar until it dissolves.
  4. Add butter and whisk until is incorporated. Add salt. Pour caramel over popcorn and use two wooden spoons to toss and mix the popcorn until it is coated in the caramel mixture. Do not use your hands as the sugar will be incredibly hot. Set popcorn aside to cool while you make the cookie batter.
  5. Weigh sorghum flour, buckwheat flour, brown rice flour, white rice flour, and baking soda into a medium mixing bowl and whisk them until well combined.
  6. In the bowl of a standmixer fitted with the paddle attachment (or in a large bowl using a handheld mixer) beat together butter and sugars until light and fluffy, about three minutes.
  7. Add egg and vanilla and beat until well incorporated.
  8. With mixer on low speed add whisked dry ingredients and mix until incorporated.
  9. Using a wooden spoon mix in popcorn and white chocolate chips.
  10. Using your hands form heaped tablespoonfuls of batter into balls and place on prepared baking trays. Leave about 6cm between cookies to allow for spreading. You may need to bake the cookies in two batches depending on the size of your baking sheets.
  11. Bake cookies for 12-15 minutes or until they are spread out and the edges are golden. These cookies will still be incredibly soft when they come out of the oven. This accounts for the chewiness. Allow the cookies to cool completely on the trays before removing and serving or storing.

Salted Caramel Popcorn Cookies | Gluten Free | Thoroughly Nourished Life

Homemade Honeycomb | gluten free

We’re in New Orleans at the moment experiencing all the delight of the bayou and Bourbon St. I left these with my sister when I left…I wonder if she’s saved me any…

Sweet crystals of honey delight! Make your own honeycomb at home with just a few simple ingredients and have fun decorating it just the way you want! Homemade Honeycomb | Gluten Free | Thoroughly Nourished LifeI am not exaggerating when I say that chocolate coated honeycomb contributed to my good report cards in high school. Violet Crumble bars, strawberries, and almonds dipped in Nutella (try it, but don’t blame me…) were what fuelled my late night study of religion essays, math assignments, chemistry calculations, and Japanese vocab memorisations. Whenever end of term came round Mum knew to stock up on Violet Crumble and strawberries and make sure my little dog Tex stayed inside while I worked late into the night. Thanks Mum.Homemade Honeycomb | Gluten Free | Thoroughly Nourished LifeI’ve always loved honeycomb. The way it shatters. The sticky, pure sugar sweetness. And most of all, the chocolate coating. Now, in Australia there is a division between Crunchie people and Violet Crumble people. I am a Violet Crumble girl myself. Unfortunately most chocolate-coated honeycomb bars include both wheat and gelatine. No bueno. Enter: my kitchen and a little bit of really awesome chemistry! See Mama, those late night sessions didn’t go to waste!Homemade Honeycomb | Gluten Free | Thoroughly Nourished LifeHoneycomb is essentially a heated sugar syrup with most of the moisture removed by boiling it for a long time to a high temperature. When you add the baking soda to the hot syrup it is forced to break down quickly and carbon dioxide molecules are released in bubbles. These bubbles become trapped in the sugar syrup that has formed long threads of crystals, hence the light, airy, bubbly texture of honeycomb. Sweet, sweet science. Making honeycomb at home is a great way to teach kids about science!

Now, let me issue my warning: this recipe involves heating sugar syrup to high temperatures and is therefore not suitable for small children to make on their own. Be very careful when you make this candy treat so that you can enjoy it at home, and not in the hospital. Homemade Honeycomb | Gluten Free | Thoroughly Nourished LifeWith that warning out of the way. Let me say: making honeycomb at home is totally worth it. You only need a few inexpensive ingredients, a large pot, a massive baking tray, and a candy thermometer. I picked mine up at out local grocery store for under $10.

I had so much fun making and eating this favourite childhood treat and then I decided that the only way to up the ante was to decorate it with sprinkles! Because sprinkles make even the best treats even better! Try this for some homemade trick-or-treating fun or as gifts for friends! Just remember to brush your teeth afterwards 🙂Homemade Honeycomb | Gluten Free | Thoroughly Nourished Life

Homemade Honeycomb

Gluten free | Makes: A LOT. Seriously, if you aren’t prepared to eat honeycomb for a ages, or give it away, then make a half batch.

Ingredients

  • 1 1/2 cups white sugar
  • 1/2 cup honey
  • 1/3 cup water
  • 2 tablespoons golden syrup
  • 2 teaspoons baking soda
  • 200 grams chocolate, roughly chopped
  • Sprinkles to decorate, optional

Method

  1. Prepare a large rimmed baking sheet by lining it with baking paper. Spray with cooking oil or spray to make removal of the honeycomb easier. Make sure your baking sheet is at least 20 x 12 inches. Or prep two smaller baking sheets.
  2. Place white sugar, honey, water and golden syrup into a large saucepan. Warm over a low heat, stirring constantly, until the sugar has melted.
  3. Increase temperature to high and bring the sugar syrup to boiling point. The mixture will rise in the pan while it is boiling. Cook without stirring at all until the temperature reads 154C (309F) on your candy thermometer. This is hard crack stage. Be very careful around the syrup.
  4. Remove from the heat and allow the bubbles to reduce then add baking soda. Quickly stir the baking soda in. The mixture will begin to bubble immediately.
  5. Working quickly spread the honeycomb over your lined baking sheet. It will continue to bubble and foam so place it on some newspaper on your kitchen bench just in case.
  6. Allow the honeycomb to cool completely.
  7. Break honeycomb into large shards.
  8. Melt chocolate by placing it into a microwave-proof bowl and heating in 30 second blasts, stirring well in between with a metal spoon, until the chocolate is melted and smooth.
  9. Coat honeycomb shards using a spoon and decorate with sprinkles if using.

Homemade Honeycomb | Gluten Free | Thoroughly Nourished Life

Pistachio Chai Muffins | Gluten Free

Today we are spending the day with our friends Lynn and Matt in Philadelphia! But I remembered to bake you a few delicious morsels that you could enjoy while Chris and I are off on our grand USA adventure! Today I’m bringing you these tender, spiced muffins studded with creamy pistachios. Pistachio Chai Muffins | Gluten Free | Thoroughly Nourished LifeMy latest career aspiration: become The Muffin Woman. You know, the one who lives on Drury Lane? Okay, I don’t live on Drury Lane, but maybe I can become The Muffin Woman. Or the muffin and cookie woman? Or the muffin, cookie, and way-too-many-quinoa-salads woman? I think I’ll just stick with Moonlighting Food Blogger Woman. Who also happens to make lots of muffins. Because make muffins I do.Pistachio Chai Muffins | Gluten Free | Thoroughly Nourished LifeI baked these beauties one Friday night in anticipation of a sweet, slow breakfast the next morning. The smell of baking spice and brown sugar wafting through the house was so tempting – and I managed to only gobble one of them down when they came out of the oven. The combination of creamy pistachios and hearty spiced chai is delightful and these muffins are definitely better on the second day. The spices settle and become more pronounced when they are cooled down, and the tops become slightly crispy-chewy while the crumb stays moist, fluffy, and soft. The chai taste here comes not from a mix of spices, but directly from the tea bag! You just cut open two chai tea bags and add them directly to the batter – direct flavour delivery!Pistachio Chai Muffins | Gluten Free | Thoroughly Nourished LifeWhile these muffins taste decadent, they are actually secretly healthy! There’s only 1/3 cup of brown sugar and 3 tablespoons of oil in the whole recipe! The secret to great-tasting healthier muffins is to amp up the spice factor, and these Pistachio Chai Muffins deliver! They are also kept moist by a healthy dose of Greek yoghurt in the batter – another healthy muffin making secret. Pistachios are one of my favourite nuts, and these creamy green delights are both mixed into the batter and sprinkled on top. Put the kettle on my friends, pour yourself some chai and make a batch of muffins today!Pistachio Chai Muffins | Gluten Free | Thoroughly Nourished Life

Pistachio Chai Muffins

Makes 12 muffins | Gluten Free | Wrap leftovers tightly in plastic wrap and freeze for up to two months

Ingredients

  • 80 grams sorghum flour
  • 80 grams white rice flour
  • 80 grams brown rice flour
  • 1 teaspoon baking powder
  • 1 teaspoon baking soda
  • 1/4 teaspoon salt
  • 2 chai tea bags
  • 1/2 cup milk
  • 1/2 cup Greek (or natural) yoghurt
  • 3 tablespoons rice bran oil
  • 2 teaspoons vanilla essence
  • 1 egg
  • 1/3 cup brown sugar
  • 1/3 cup + 2 tablespoons shelled pistachios

Method

  1. Preheat your oven to 180C (350F) and oil a 12-hole (1/3 cup) muffin tin very thoroughly.
  2. In a large bowl whisk together sorghum flour, white rice flour, brown rice flour, baking powder, baking soda, salt, and the contents of the two tea bags.
  3. In a medium bowl whisk together milk, yoghurt, oil, vanilla essence, egg and brown sugar until very well combined.
  4. Pour wet ingredients into dry ingredients and stir until just combined. Add 1/3 cup of pistachios and mix until distributed.
  5. Divide mixture evenly between holes in pre-oiled muffin tin.
  6. Roughly chop extra two tablespoons pistachios and sprinkle over the top of the uncooked muffins.
  7. Bake for 15-17 minutes or until the tops are golden and spring back when lightly touched.
  8. Remove muffins from the oven and allow them to cool in the tin for 10 minutes. To remove easily run a thin-bladed knife around the baked muffins to loosen them from the tin.
  9. Serve with a cup of chai!

Pistachio Chai Muffins | Gluten Free | Thoroughly Nourished Life

Spicy Black Bean Burgers with Sriracha Sauce | gluten free

Today we are exploring New York City and discovering all the tastes this vast city has to offer. While I’m out and about, enjoy these hearty vegetarian burgers!

Juicy, hearty, spicy vegetarian burgers full of flavour and topped with a cool and spicy sriracha sauce. Get out your buns and let’s get grilling!Spicy Black Bean Burgers with Sriracha Sauce | Gluten Free | Vegetarian | Thoroughly Nourished LifeVegetarian burgers don’t always get the best reviews. I don’t think I’ve ever eaten a commercially made vegetarian burger because they always just seem so lackluster and like they are trying to be meat. You aren’t meat, Miss Vego Burger, you are a vegetarian burger and you need to celebrate your uniqueness and embrace your true personality! Down with the burger patriarchy! Ahem.

When Yum. Gluten Free Magazine contacted me to contribute to their burger issue I jumped at the chance to create a vegetarian burger that could proudly stand on it’s own two feet and declare – yes, I am a vegetarian burger and I have a lot to offer the world of flavour! I attempted to Oprah the burger. Yes, Oprah can be used as a verb.Spicy Black Bean Burgers with Sriracha Sauce | Gluten Free | Vegetarian | Thoroughly Nourished Life

Spicy Black Bean Burgers with Sriracha Sauce | Gluten Free | Vegetarian | Thoroughly Nourished LifeThe thing with meat is that it is layered and complex and contributes lots of umami flavours by virtue of the glutamine (an essential amino acid) found in muscle. Take away the muscle, and you need to add that umami back in, and bump up all the other flavours to create a whole vegetarian burger experience that doesn’t feel like second place. So, we are bringing soy sauce into the picture to contribute umami, cumin for a deep background flavour, and sriracha and chili flakes for top level heat (reduce/omit to tone down the spice).Spicy Black Bean Burgers with Sriracha Sauce | Gluten Free | Vegetarian | Thoroughly Nourished LifeThe body of these burgers is made up of black beans and quinoa. Black beans are sensationally hearty and make a wonderful base for a burger when coupled with quinoa. When you bite into my hearty, wholesome vegetarian burgers you get spicy, umami, hefty burger, creamy avocado, and spicy cool sriracha yoghurt. Every bite is full of flavour. There’s nothing weak, wimpy, or second place about these vegetarian burgers. Stand in your truth Miss Vego Burger and embrace your natural beauty. Spicy Black Bean Burgers with Sriracha Sauce | Gluten Free | Vegetarian | Thoroughly Nourished Life

Spicy Black Bean Burgers with Sriracha Sauce

Gluten Free | Vegetarian | Makes 4, easily multiplied

Preparation Time: 45 minutes Cooking Time: 20 minutes

Tip: If you don’t want these burgers to be quite as spicy you can leave out the sriracha and the red chili.

Ingredients

  • ¾ cup quinoa
  • 1 ½ cups vegetable stock
  • 1 cup black beans (approximately 400gram tin)
  • 1 teaspoon ground cumin
  • 1 tablespoon gluten free soy sauce
  • 1 tablespoon sriracha
  • ½ teaspoon black pepper
  • 1 egg
  • 1 spring onion, thinly sliced
  • ½ red chilli, finely diced
  • ¼ cup coriander leaves
  • 1/3 cup quinoa flakes

To serve:

  • 1 small avocado
  • 1 tablespoon lime juice
  • ½ cup Greek yoghurt
  • 1 tablespoon sriracha (plus extra to serve)
  • 4 gluten free hamburger buns
  • Lettuce leaves

Method

  1. Place quinoa and vegetable stock in a medium size saucepan. Cover and bring to the boil. Allow quinoa to boil for 5 minutes, then turn the heat to low and simmer for 15 minutes. Remove from heat, drain thoroughly, and allow to cool to room temperature.
  2. Drain tinned black beans and rinse. Place some paper towels on a rimmed baking sheet and spread beans out to drain completely.
  3. Preheat oven to 180C (350F) and line a rimmed baking sheet with baking paper.
  4. Place one cup cooled quinoa and half the drained black beans in the bowl of a food processor. Pulse until a chunky paste starts to form.
  5. Place paste into a bowl and add cumin soy sauce, sriracha, pepper, egg, onion, chilli, coriander, quinoa, and remaining beans and quinoa and mix thoroughly to combine.
  6. Form batter into four patties and press down slightly to flatten.
  7. Bake in preheated oven for 15 minutes. Then turn patties over and bake for a further 15 minutes.
  8. Mash avocado with a little salt and pepper and lime juice.
  9. Mix sriracha with Greek yoghurt.
  10. To assemble: slice buns and place lettuce on each. Top with a spicy black bean burger, a dollop of mashed avocado and a serving of sriracha yoghurt.

Spicy Black Bean Burgers with Sriracha Sauce | Gluten Free | Vegetarian | Thoroughly Nourished Life

Rum and Raisin Brownies with Brown Sugar Rum Frosting | gluten free

Rum is the rebels drink. I like to think of these as the rebel’s brownies. Rum and raisin taken out of the chocolate wrapper and baked into chewy, rum-soaked raisin and bittersweet chocolate gluten free brownies, and then there’s the brown sugar and rum frosting. Yo ho ho.Rum and Raisin Brownies | Gluten Free | Thoroughly Nourished LifeDear Mum,

I think we’ve had a good run of non-rebelliousness these past few decades. I didn’t steal your car keys or money from your wallet. I was a teenager who enjoyed showering and personal hygiene. I didn’t get so much as my ears pierced until I was 24. But my sweet Mama, times they are a-changing because today I’m rebelling against one of your strictest rules: no dried fruit in chocolate baked goods. I know this might see me written out of the will, but you have to believe me: it’s worth it.Rum and Raisin Brownies | Gluten Free | Thoroughly Nourished Life

Rum and Raisin Brownies | Gluten Free | Thoroughly Nourished LifeYou see the raisins are plumped up in a bit of vanilla rum and then folded into midnight chocolate brownie batter. They bake up chewy and moist. Each bite is punctuated by sweet rum-soaked raisins and bittersweet chocolate chunks. And then, because you always taught me that more is more when it comes to desserts, these chewy, rummy brownies are frosted with brown sugar rum frosting. Mother dearest, this frosting is everything. It’s rum-enhanced evenings under Caribbean skies, dark midnight snacks by the refrigerator light, all the merriest of moments in one fluffy brown sugar mouthful. These are pirate trap brownies, desert island cookie jar brownies, totally over-the-top Friday night brownie-instead-of-a-cocktail brownies. I hope you can see it in your heart to forgive me some day. Until then, I will be sitting in the corner with a chocolate stained smile and rum-sticky fingers.

Love, your oldest daughter.Rum and Raisin Brownies | Gluten Free | Thoroughly Nourished LifeDear Dad,

I got your back. Eat these in the shed and don’t share with Molly.

Love, your oldest ratbag.Rum and Raisin Brownies | Gluten Free | Thoroughly Nourished Life

Rum and Raisin Brownies with Brown Sugar Rum Frosting

Gluten Free | Makes 16 pirate-sized brownies | Leftovers will keep in an airtight container in the refrigerator for up to three days

Ingredients

  • 1/2 cup raisins
  • 2 tablespoons vanilla rum (Sailor Jerry is our household favourite)
  • 35 grams white rice flour
  • 40 grams buckwheat flour
  • 3o grams (1/4 cup) cocoa powder
  • 150 grams good quality dark chocolate, chopped
  • 150 grams butter, chopped
  • 150 grams (3/4 cup) caster sugar
  • 4 large eggs
  • 1 teaspoon vanilla extract
  • 1/2 cup  chocolate chips (milk or dark)

For the frosting

  • 100 grams butter, softened
  • 50 grams (1/4 cup) brown sugar
  • 1 tablespoon vanilla rum
  • 2 cups icing sugar
  • 2 tablespoons milk

Method

  1. Preheat your oven to 180C (350F) and line an 8-inch (20cm) square tin with baking paper.
  2. Place raisins in a small bowl and pour over rum. Allow to sit while you prepare the brownie batter.
  3. In a medium mixing bowl whisk together white rice flour, buckwheat flour, and cocoa powder.
  4. Place chocolate and butter in a large microwave-safe bowl and heat in 30 second blasts, whisking well in between blasts, until chocolate and butter are melted and smooth (mine only took 1 minute total, but it will differ depending on your microwave). Allow to cool slightly.
  5. Whisk eggs lightly and add to the chocolate mixture along with caster sugar, vanilla extract and whisked dry ingredients. Stir until smooth.
  6. Add raisins and any leftover soaking liquid and chocolate chips and mix until distributed.
  7. Pour batter into prepared baking tin and bake in preheated oven for 35 – 40 minutes or until a skewer inserted into the middle comes back with only a few moist crumbs clinging to it.
  8. Allow brownies to cool completely before frosting.
  9. To make the frosting place all ingredients into the bowl of a standmixer fitted with the paddle attachment (you can use a large bowl and a handheld mixer instead) and beat until light and fluffy. Smooth frosting over the cooled brownies, cut and serve.

Rum and Raisin Brownies | Gluten Free | Thoroughly Nourished Life

Spicy Peanut Zucchini Noodle Stuffed Roasted Capsicums | gluten free | vegan

You need to make these tonight. Spicy peanut sauce coats zucchini noodles stuffed inside sweet roasted capsicums for a vegan, gluten free dinner that tastes sinful, but is secretly healthy – and super easy!Peanut Zucchini Noodle Stuffed Roasted Capsicums | Gluten Free | Vegan | Thoroughly Nourished LifeI love peanut sauce dishes. You can just put another notch in the ‘Things Amy loves that contain Peanuts’ list that I’m sure everyone is keeping. Basically the list reads: everything. If there is a way to add peanut butter to a dish I will find it. This dish is no exception. The peanut sauce that coats the zucchini noodles is everything a peanut sauce should be: deeply peanutty with a hint of sweetness, a dash of astringency, and a good dose of spice. I have so many memories of a peanut satay sauce that my sister and I were both in love with during high school. I don’t think either Mum or Dad were particularly fond of it, but they let us ride out our teenage cravings. Plus, they were getting dinner cooked for them, so I guess that was a win on their behalf 😉Peanut Zucchini Noodle Stuffed Roasted Capsicums | Gluten Free | Vegan | Thoroughly Nourished LifeFast forward to today and I’d much rather create my own sauces than get them from a bottle – it’s all about customisation, and avoiding any unnecessary additives, right? And making your own spicy peanut sauce is easier than getting the ‘safety plastic’ off a shop bought bottle. Anyone else unable to get that stuff off? Just me? Moving on.

These roasted capsicums are fancy enough to serve to company, but easy enough for everyday, and while the peanut sauce is decadent, they are actually quite healthy! Rather than using noodles I made zucchini ‘noodles’ and coated them in the peanut butter sauce then stuffed them inside the roasted capsicums. Result: delicious and healthy.Peanut Zucchini Noodle Stuffed Roasted Capsicums | Gluten Free | Vegan | Thoroughly Nourished LifeThe spicy, savoury peanut sauce coated noodles are a great contrast to the sweet roasted capsicums. And the capsicums act as perfect containment for every single drip of peanut sauce. You can’t let that deliciousness escape!Peanut Zucchini Noodle Stuffed Roasted Capsicums | Gluten Free | Vegan | Thoroughly Nourished LifeThis dish comes together in six simple steps:

  1. Cut capsicums in half and remove seeds.
  2. Bake.
  3. Prepare noodles and sauce and mix.
  4. Stuff capsicums.
  5. Bake again.
  6. Serve.

Peanut Zucchini Noodle Stuffed Roasted Capsicums | Gluten Free | Vegan | Thoroughly Nourished LifeFor those six simple steps you are rewarded with layers of flavour in every single bite. To take this to the next level I couldn’t help but garnish it with extra salted peanuts and some chopped spring onions for a little extra crunch. Every bite is a mouthful of molten sweet roasted capsicum, spicy peanut sauce soaked zucchini noodles, crispy spring onions and salty-crunchy peanuts. It’s everything a Wednesday night needs without being so heavy you want to hibernate for the rest of the week. Bonus: your kitchen will smell like the best Asian restaurant in town as these flavours mingle in the oven.Peanut Zucchini Noodle Stuffed Roasted Capsicums | Gluten Free | Vegan | Thoroughly Nourished Life

Spicy Peanut Zucchini Noodle Stuffed Roasted Capsicums

Gluten free | Vegan | Serves 2 as a main or 4 as a light meal or appetiser | Preparation time: 20 minutes | Cooking time: 40 minutes

Ingredients

  • 2 medium size red capsicums (bell peppers)
  • 1 large zucchini (or 2 medium)
  • 1 clove of garlic
  • 2 1/2 tablespoons crunchy peanut butter
  • 1 lime, juiced
  • 1 tablespoon soy sauce (ensure this is gluten free)
  • 2 teaspoons brown sugar
  • 1 teaspoon fresh grated ginger
  • Sprinkle of chili flakes (optional)
  • 1/3 cup roasted salted peanuts
  • 1 spring onion, thinly sliced

Method

  1. Preheat your oven to 180C (350F).
  2. Cut your capsicums in half and remove the core and seeds. I like to leave the little green tops because I think they look cute.
  3. Place capsicum halves cut side down in an ovenproof baking dish. Mine was about 6 x 8 inches.
  4. Bake capsicums for 20 minutes and then remove from the oven.
  5. While the capsicums are baking, prepare your filling.
  6. Using a vegetable spiraliser or a julienne peeler create long thin ‘noodles’ from your zucchini.
  7. Crush garlic into a medium mixing bowl and whisk together with peanut butter, lime juice, brown sugar, grated ginger, and chili flakes.
  8. Toss zucchini ‘noodles’ with peanut sauce gently but thoroughly until they are coated in the mixture.
  9. Pile zucchini into capsicum halves. Spoon any extra sauce over the noodles.
  10. Bake for a further 20 minutes or until the tops of the noodles are golden.
  11. Remove capsicums from oven. Toss together salted peanuts and spring onions and top the capsicum halves.
  12. Serve with a green salad and enjoy!

Peanut Zucchini Noodle Stuffed Roasted Capsicums | Gluten Free | Vegan | Thoroughly Nourished Life